


Recently, some users feedback they are confused on how to use Humzor NEXZDAS PRO, especially the user registration, Serial Number binding, Bluetooth connection. Therefore, uobdii.com engineer work out a sheet of user manual below. Good to know: no matter you bought Humzor NexzDAS Pro Bluetooth with 10inch Tablet or Humzor NEXZDAS PRO without the tablet, you can follow the steps below to do.
Content Table:
Part 1. Humzor NEXZDAS PRO User Registration
Part 2. Bind the Serial Number of Humzor NEXZDAS PRO
Part 3. Humzor NEXZDAS PRO Bluetooth Connection
Part 1. Humzor NEXZDAS PRO User Registration
When you access to the “NEXZDAS” application for the first time, you need to follow the steps below to register:
- Click on “NEXZDAS” icon on the desktop to open the application.
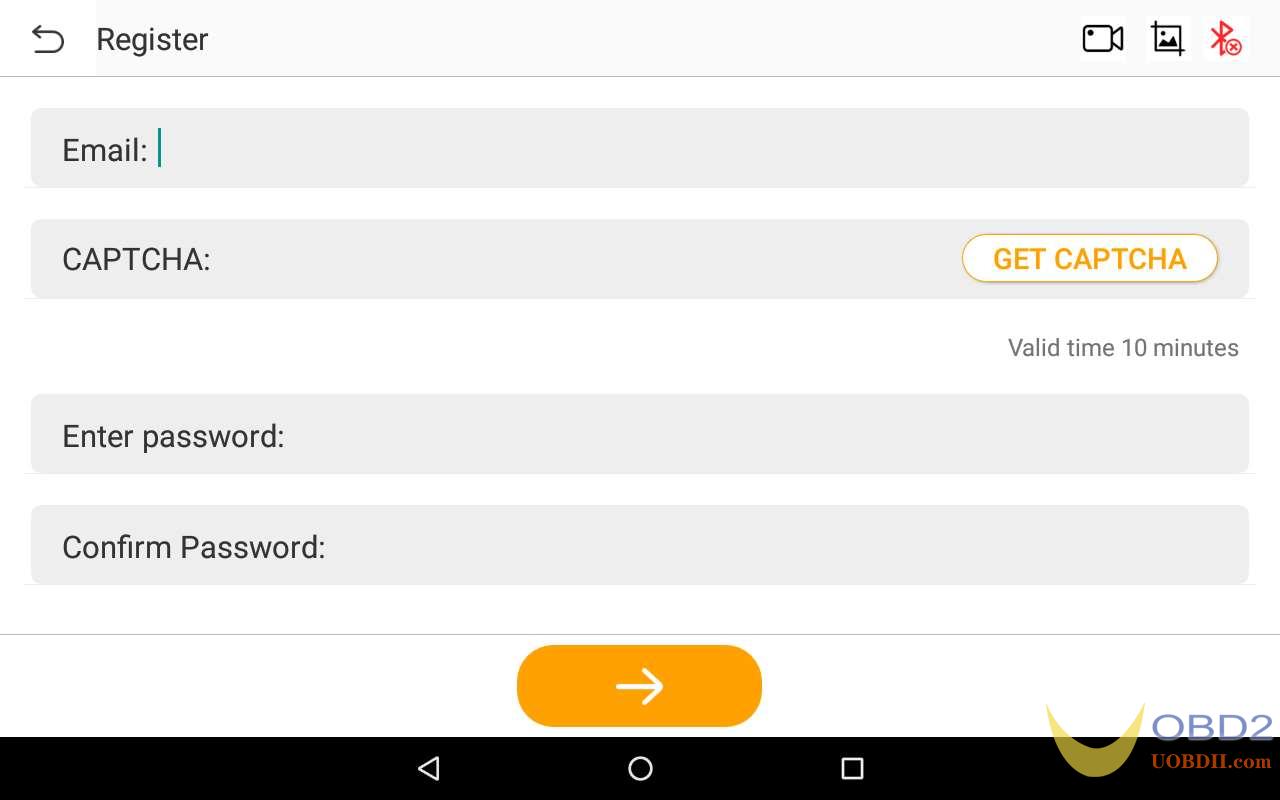
- On the Login interface, click on “Register” button to enter the registration interface.
- Enter your mailbox in the “Email” column.
- Click on “GET CAPTCHA” button to get your captcha.
- Enter the captcha you obtained in the “CAPTCHA” column.
- Set up your password in the “Enter password” field, and enter your password again in the “Confirm Password” field.
- Click the “->” button at the bottom, once your email account, captcha, and password format are entered correctly, then the registration will be successful.

User Login:
After registering, please log in, there are 5 steps to follow:
- Double click on “NEXZDAS” icon on the desktop.
- Enter the email in the “E-mail” column.
- Enter your login password in the “Password” column.
- Click on the icon
 on the right side of the “Password” column to encrypt your password, and wait until the icon becomes
  , click on the icon
  on the right side of the “Password” column to display your password, and the icon will turn into 图6.
 - Click on the “Login” button. Once you entered the correct account and password, login will succeed and the system will take you to the serial number binding and selection interface.
Change Password
If you forget your password or need to set a new password, please follow the steps below:
- Double click on “NEXZDAS” icon on the desktop.
- On the login and registration interface, click on “Forget Password?” button to enter the password reset interface.
- Enter your login account in the “Account” field.
- Click the “GET CAPTCHA” button to get your captcha.
- Enter the captcha you obtained in the “CAPTCHA” field.
- Enter your new password in the “Input the new password” field, and enter your new password again in the “Input the Password again” field.
- Click the “->” button at the bottom, once your account, captcha, and password format are entered correctly, then the new password is set successfully.

Part 2. Bind the Serial Number of Humzor NEXZDAS PRO
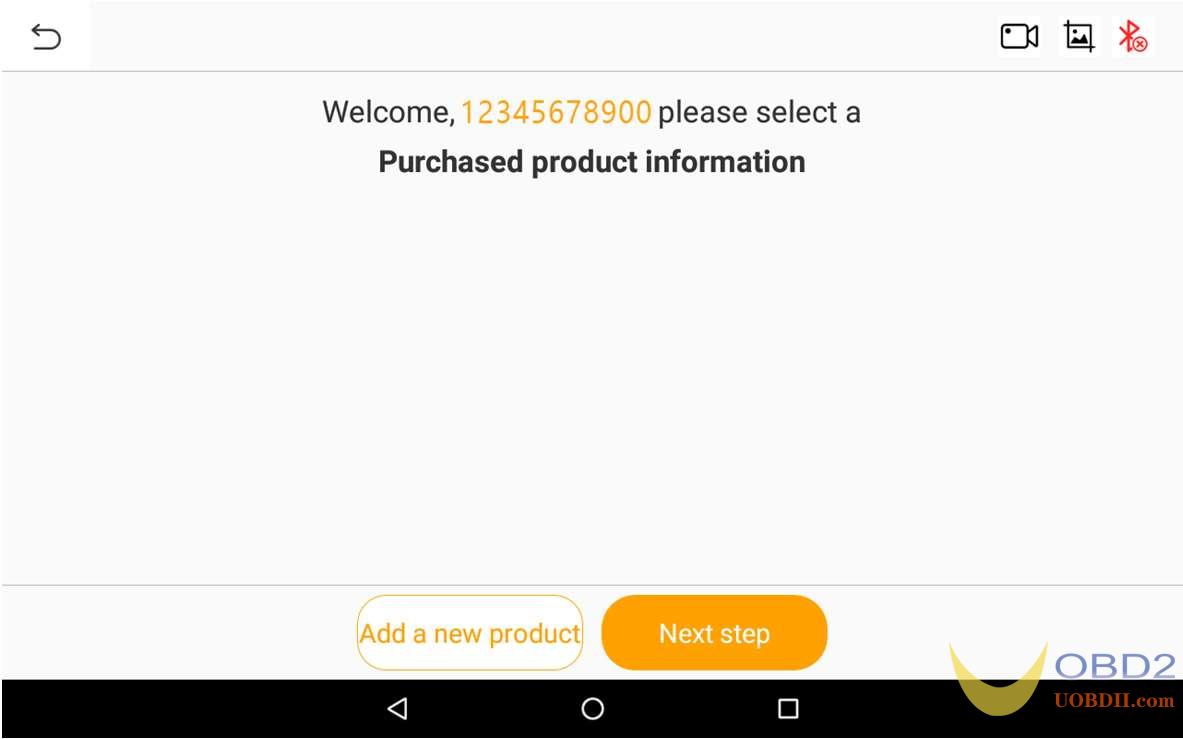
After logging in successfully, you will be taken to the serial number binding interface, where you can add, delete, and select products.
To Bind Humzor NEXZDAS PRO
Method 1. Manually input
- Click on “Add a new product” button and the “Binding serial number” interface will pop up.
- Enter the serial number (S/N) of the device you purchased in the “Serial number” field, and enter the Activation code of the device in the “activation code” field.
- Click on “Okay” button. If the serial number and activation code you entered are as the same as the serial number and activation code of the purchased device, the binding is successful.

Method 2. Scan code to binding
- Click on “Add a new product” and the “Binding serial number” interface will pop up.
- Click on the scan code icon on the right side of the “activation code” column to open the scan interface.
- Align the QR code of the device you purchased, and if the code is scanned successfully, the serial number will be automatically bound.
To Delete Humzor NEXZDAS PRO
If you need to delete the serial number, swipe your finger to the left on the row of the serial number that needs to be deleted, and click the “Delete” button that slides out to successfully delete the serial number.
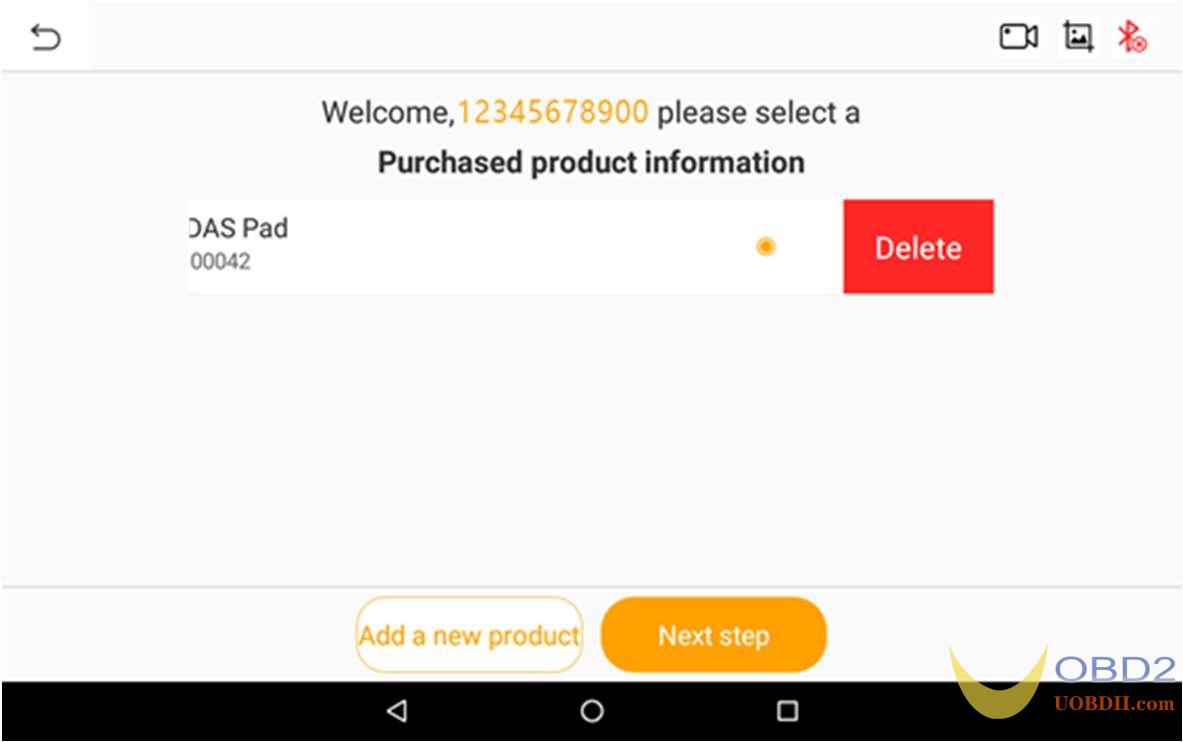
To Select Humzor NEXZDAS PRO
- Click the product serial number you need to enter, and the icon on the right becomes
 .
. - Click on “Next step” button and the system will guide you to the main interface of “HUMZOR”.
Enable the Tablet Location Permission
IMPORTANT
The tablet with Android 6.0 or above is supposed to get tablet address information. If your tablet device does not have permission to allow get your location, please follow the steps below to turn it on.
- On the main interface of “HUMZOR”, click the icon
 on the right side of the top navigation bar.
In the pop-up location permission prompt box, click the “OK” button.

- In the Location interface, click the switch button on the right of the “Off” column, and it turns to “On”, and the location permission is successfully activated.
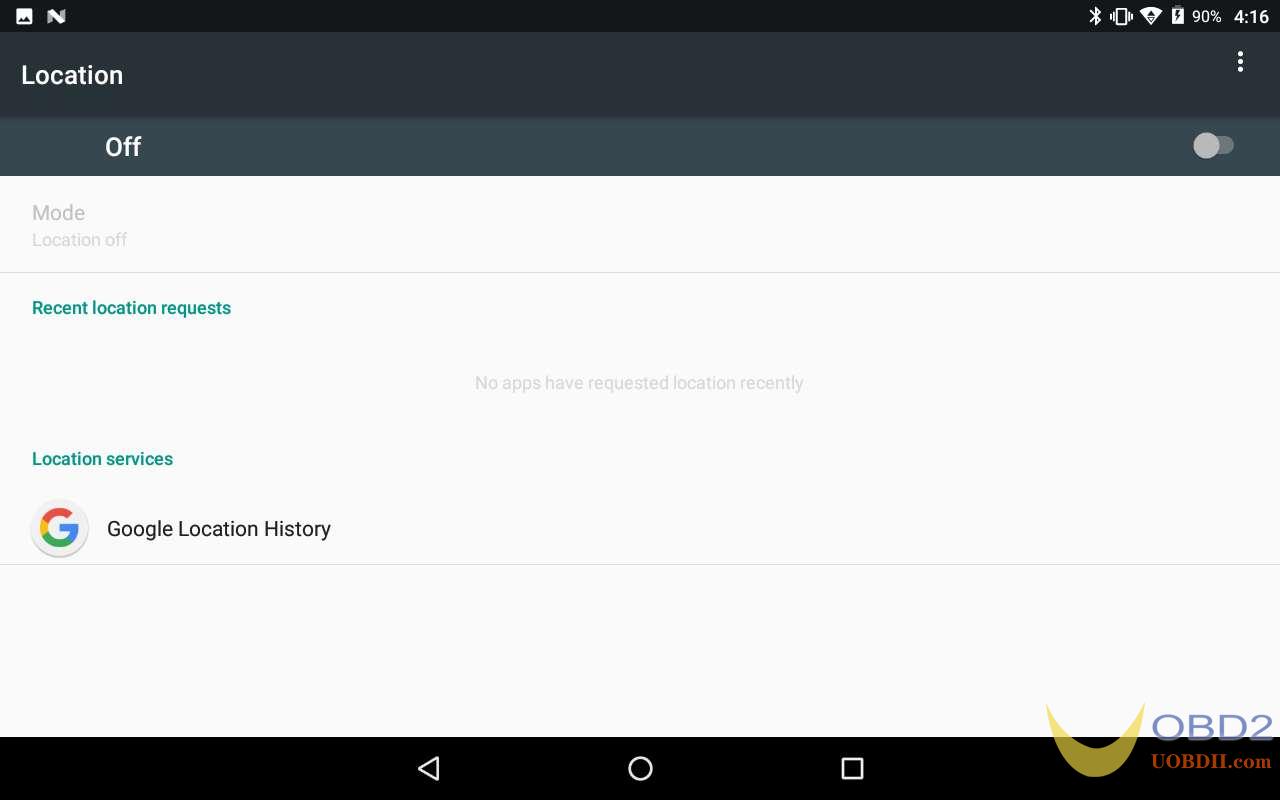
- Click the back button at the bottom of the tablet to return to the “HUMZOR” main interface. The position icon on the right side of the top navigation bar is not displayed anymore.
Part 3. Humzor NEXZDAS PRO Bluetooth Connection
After selecting the product serial number to enter the “HUMZOR” main interface, you can view and connect to the VCI device with the corresponding serial number you have purchased in the following steps:
- Insert the VCI of the HUMZOR NEXZDAS product you purchased tightly into the OBD port. At this time, the Bluetooth icon on the top right side is
 .
. - Turn on the ignition switch, the NEXZDAS application will automatically scan and recognize the VCI device, and establish a Bluetooth connection. At this time, the Bluetooth icon on the top right side changes to
 , and the Bluetooth connection is successful.
 - If the NEXZDAS application cannot automatically connect to your VCI device, or the device fails to connect, please click the icon button
 on the top right to reconnect, or check whether the VCI is well connected to the car’s OBD port.
Humzor NEXZDAS PRO tech support: www.uobdii.com