


Here are examples to show you the basics of coding and the specific features of VCP software on a VAG CAN PRO cable..
Car: Audi A3 8V or MQB Platform
VCP cable: clone or original?
Clone is Version 5.5.1. Genuine is actually Version 8.x
You are limited with some tasks, but it can be used to flash some cars components for a good price. Has some guided functions, but again, limited… You can confirmed the function and car with the customer service at cardiagtool.co.uk and decide it. It will help save a lot if the clone can work for you.
Example:
First coding: Activating the visual display of the Parking Assist System
Second coding: Fuel consumption adjustments
in detail…
First, Activate the visual display of the Parking Assist System
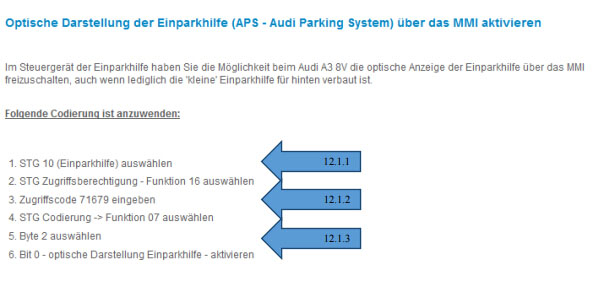
ECU (STG) 10 – connect the Parking Assist System
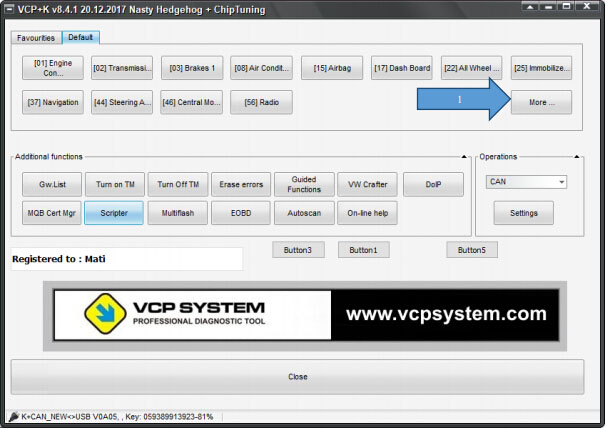
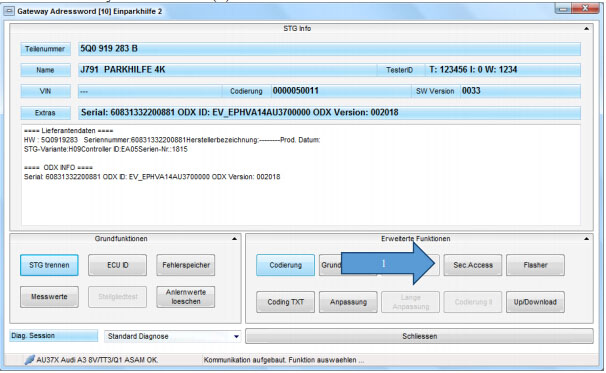
Launch the VCP and select More… (1) in the ECU Overview
open Parking Assist System ECU
You have 3 possibilities to access the desired ECU:
- via the buttons in the Overview (1)
- via manual selection by entering the particular ECU’s number (2)
- via manual selection of the particular ECU from the list (3)

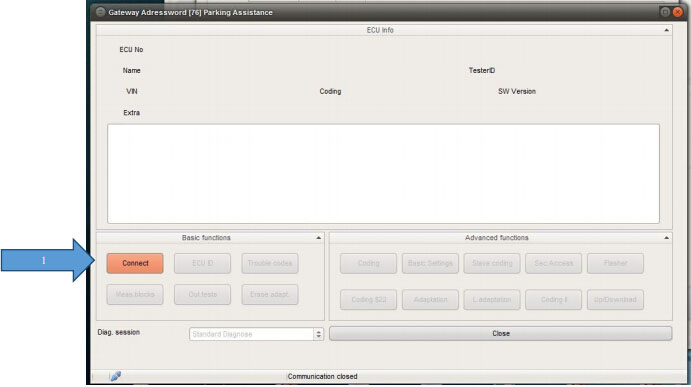
connect with Parking Assist System ECU
If you have used the manual selection, the ECU will connect automatically even if you later access this ECU, for example, via the Gateway or the fault memory.
If you have opened the ECU via the Overview area, you will have to once again click the Connect button (1). (unless the Automatic Connection function was activated in the Program Settings)
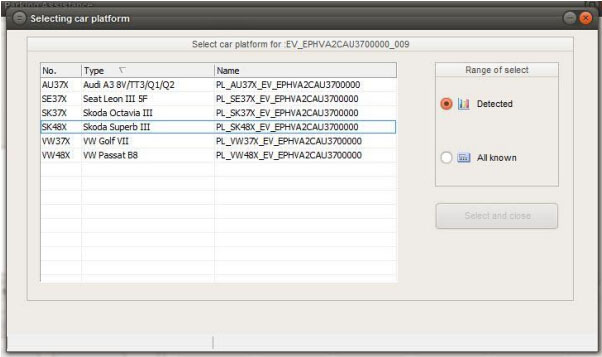
Vehicle Selection
Vehicle Selection is used to make correct assignments of the Label files.
Security Access
Press the Security Access button (1)
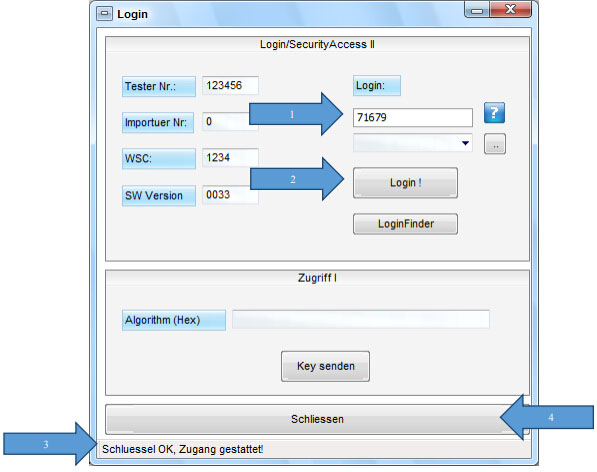
Enter the Access code (1) and log-in (2). After successfully logging in you will receive a confirmation message in the status bar (3). If the login is incorrect, or not fit for the particular ECU, you will also receive a relevant message in the status bar.
After successfully logging-in you can close the dialogue window (4).
Coding procedure
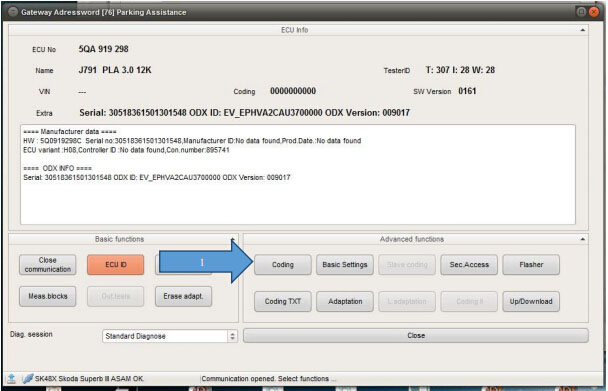
Access the Coding window (1)
Select a byte (1) tick the Bit 0 field (2) and press the Coding button (3). The Status bar (4) will indicate whether the Coding was successful, otherwise, a relevant error message will be displayed.
In our example the Access Code (described in the Secure Access section) was incorrect or not provided at all.
If this happens, repeat the procedure. If the control unit has been coded correctly the following message appears(5): ECU coded -> *STG ID*
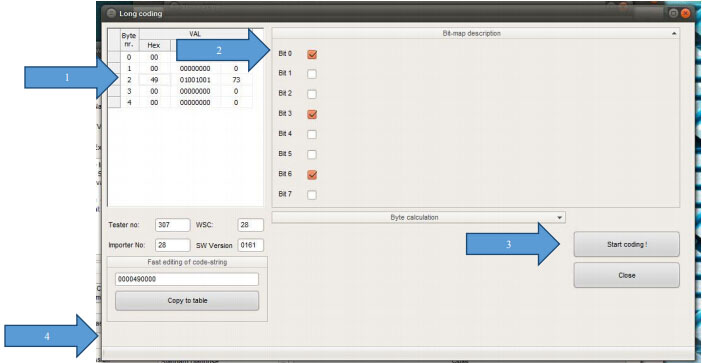
The Coding was successfully completed.
Second, Fuel consumption adjustments
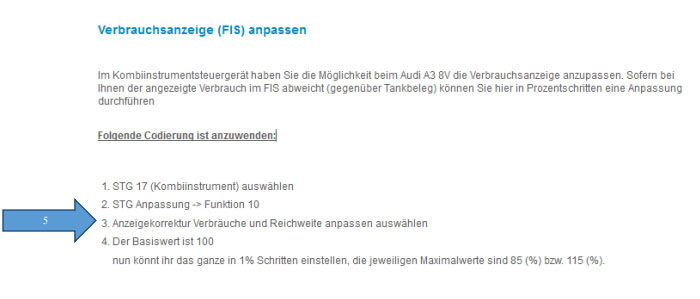
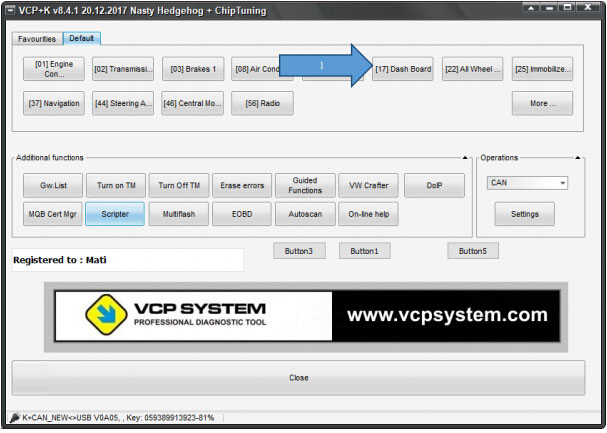
ECU (STG) 17 – connect the switchboard
Select button no. 17 – Tacho (1) from the VCP Overview
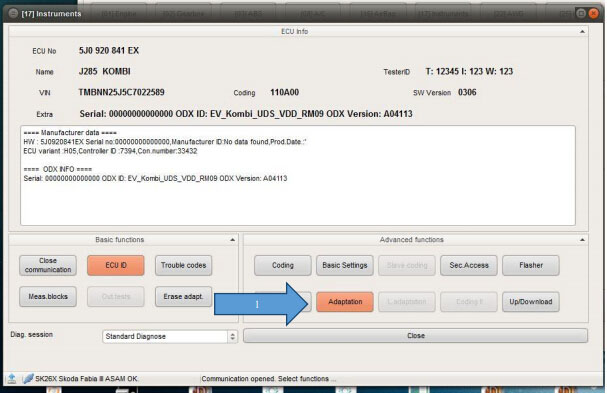
Perform the adjustments
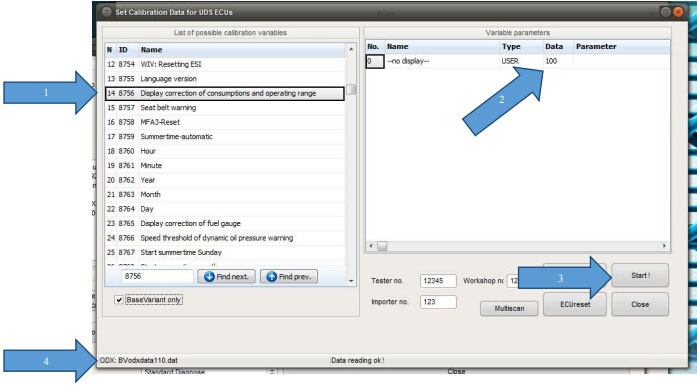
Open the Adjustments window (1)
Select the appropriate entry from among the available Parameters (1) and adjust the value. In the example the default value of 100 was adjusted to 103 (fuel consumption).
The Status bar (4) will indicate whether a Parameter set was correctly read and whether any problems were encountered while entering new values.
Hope it helps.