


J2534 programming tips and guides: Let’s take a look at what tools you’ll need to make it happen.
We’ll start with hardware:
You’ll need a computer (preferably a laptop),
a J2534 pass-thru device,
a battery maintainer,
and quality cables for connecting the computer to the pass-thru device and the pass-thru device to the vehicle OBD-II connector.
You’ll also need an internet connection.
How to choose a decent laptop with the lowest price:
The laptop doesn’t need to be anything fancy. Some scan tools that connect to the internet also offer programming capabilities.
Your laptop can be a basic machine, but you should get one that’ll run Windows 7. For now, you don’t want a computer with Windows 10. The automotive world isn’t on the cutting edge of computing technology, so most of the software you’ll be downloading from OEM sites isn’t compatible with Windows 10.
It’s also a good idea to dedicate the computer to programming only.
If you aren’t computer savvy, have a local computer guru set up your system to prevent programs from starting in the background that might interfere with the programming process.
Also, you can buy a disk with software if you have a decent laptop already, or buy a laptop with software installed (such as Mercedes Xentry/DAS or BMW ista software disk, plug and play)
Btw, it’s not necessary to get a brand-new laptop; that’s an old laptop is okay.
The laptop is old because the item is used before delivery and may have some signs of cosmetic wear, but is fully operational and functions as intended.
It’s absolutely unnecessary to get a brand-new laptop for auto repair.
It’s easily get rubbed or destroyed when used it in real maintenance.
So, to get a second-hand but workable laptop will help SAVE A LOT.
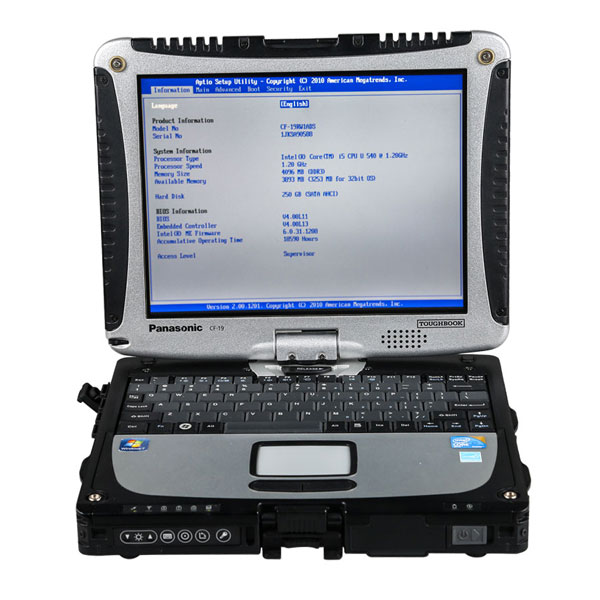
Important: A tough laptop will be better
The Panasonic is one of the toughest laptops in the world.
It’s mouthful and vying for the most indestructible, anywhere, anytime commercial notebooks.
This fully-rugged mobile PC is encased in a magnesium alloy with an 80GB shock-mounted, removable hard drive in stainless steel case, 1024 x 768 (XGA) screen resolution, Intel Core 2 Duo 1.20GHz, expandable to 4096 MB (DDR3) RAM, GPS, EV-DO, HSDPA, WiFi, Bluetooth, and up to 7 hours of battery life.
Security features are top-notch too – finger-print scanner, smart card reader, password for HDD lock and cable lock slot. It’s resistant to dust or water so you can still use it even during a downpour (you can’t bring it underwater though). Costs a whooping $6,500 if it’s a brand new. But it’s only $350 around if it’s a send-hand.
So Panasonic Toughbook 19 is much more better than Dell D630 for car repair. No worry about that it’ll be damaged by accident and not work because of bad hardware design.
With the Panasonic CF-19’s dedicated serial port, there is no issue for user…. it was plug and play… the HDD with Mercedes software is loaded into the Panasonic and software has been activated with “activation keys” before delivery…users can use it for diagnostics, coding or programming, when you receive the package.
source: ttp://www.cardiagtool.co.uk/second-hand-panasonic-cf19-I5-4gb-laptop.html
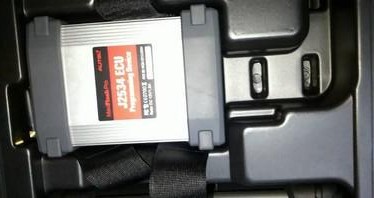
How to choose a decent J2534 pass-thru device:
Once you have a computer, you’ll need to choose a J2534 pass-thru device. Be advised: Not all pass-thru devices are the same. There’s a significant price variation, so do your homework. If you go to the vehicle manufacturer’s web site, you may find a list of brands that were tested and found to perform successfully.
One of the most important factors to consider in selecting your pass-thru tool is product support. The pass-thru device is responsible for translating and communicating programming instructions to the vehicle computer while it’s at rest.
There’s programming in the pass-thru device, called firmware, that’s responsible for performing this task according to the manufacturer’s protocol. Before attempting to program a vehicle computer, log on to the pass-thru device manufacturer’s web site and make sure its firmware is updated to comply with the latest protocol procedures.
Don’t forget the cables. Many pass-thru manufacturers will provide cables with their devices. Make sure they’re good quality cables that fit tight in the connectors. Treat them with great care. If damaged, they can create programming errors or possibly computer damage.
If you purchase your own cables, make sure they don’t exceed 16 feet; any longer could compromise signal quality. And keep all high current equipment and electric motors away from the area while programming. This can create EMI (electromagnetic interference).
AUTEL MaxiSYS Pro MS908P is the best J2534 programming tool for universal vehicles. Also works good in reprogramming.
Example: ECU Reprogramming with Autel MaxiFlashPro J2534 & MaxiSys MS908
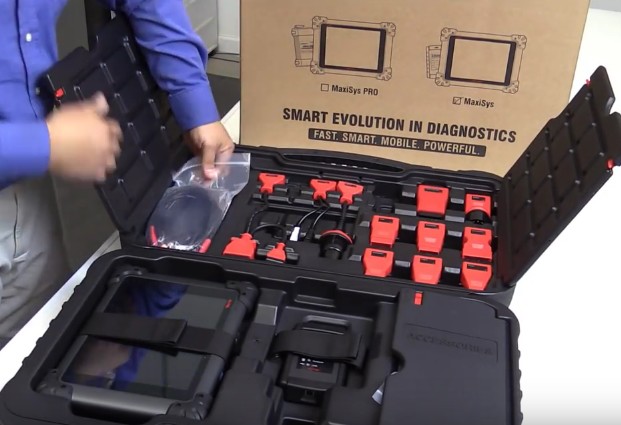
source: http://www.cardiagtool.co.uk/autel-maxisys-pro-ms908p-diagnostic-system-with-wifi.html
Connected Autel MaxiFlashPro J2534 and MaxiSys MS908
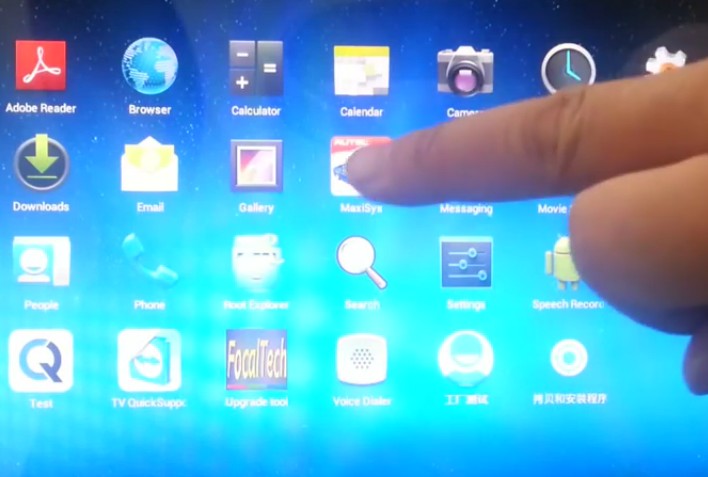
Select “MaxiSys”.
Select “Diagnostics”.
Tap the second button on the top and select “Auto detect”.
Establishing vehicle communications…
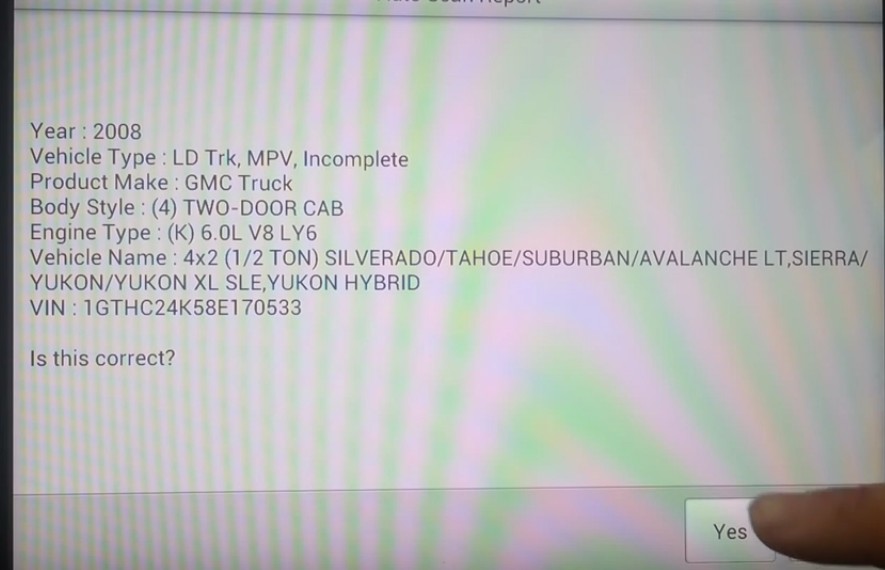
Tap “Yes” for the correct auto scan report.
Select “Programming/Customization”.
Select “Programming”.
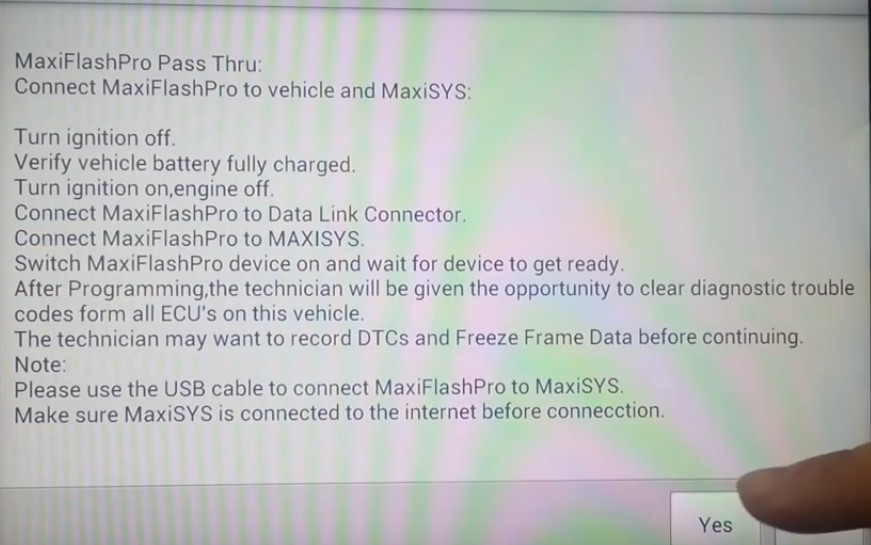
Do the following instruction according to the
“Connect MaxiFlashPro to the vehicle and MaxiSys.
Turn the ignition off.
Verify the vehicle battery fully charged.
Turn the ignition on and the engine off.
Connect MaxiFlashPro to Data Link Connector.
Connect MaxiFlashPro to MaxiSys.
Switch MaxiFlashPro device on and wait for the device to get ready.
After Programming, technician will be given the opportunity to clear diagnostic trouble codes from all ECUs on the vehicle.
The technician may want to record DTCs and Freeze Frame Data befor continuing.
Note:
Please use the USB cable to connect MaxiFlashPro to MaxiSys.
Make sure MaxiSys is connected to the internet before connection”
Select “Yes”.
Tab OK for the correct VIN.
Select “Reprogram ECU”.
Establishing vehicle communication…
Select “ECU-Engine Control Module”.
Tap “Help” and then tap “OK” to back.
Page down, and select “OK”.
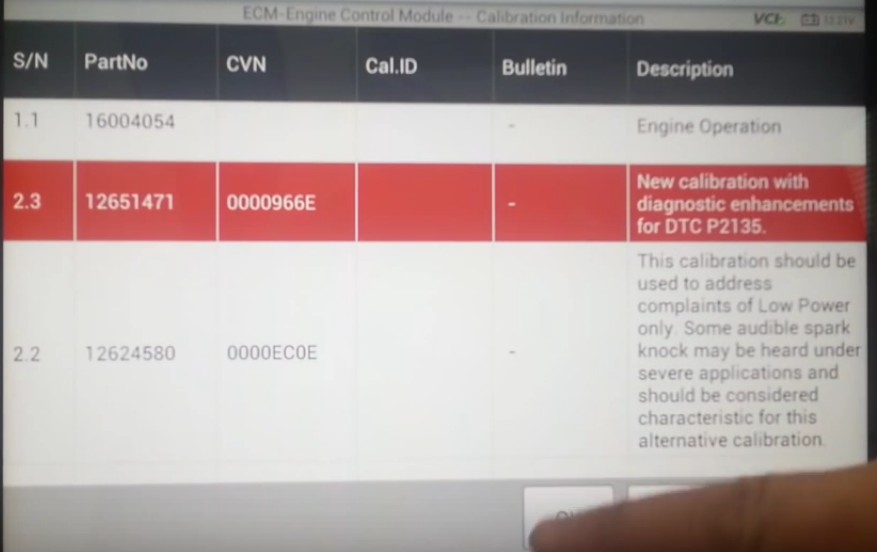
Select “Engine operation” to go on.
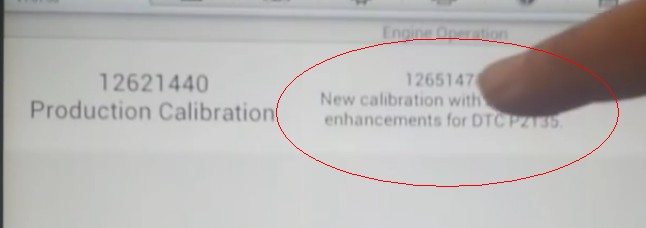
Select this.
Tap OK.
Tap OK.
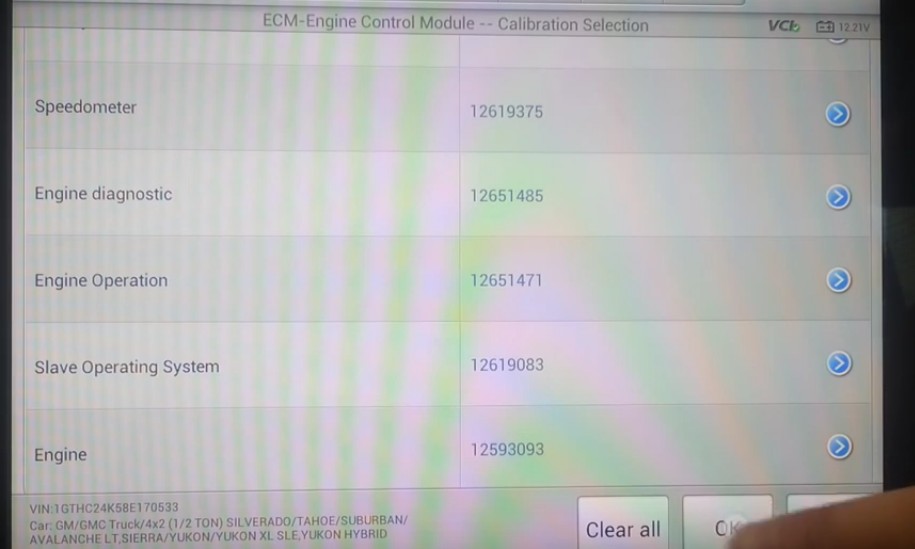
Page down to read ECM information and tap OK to download files.
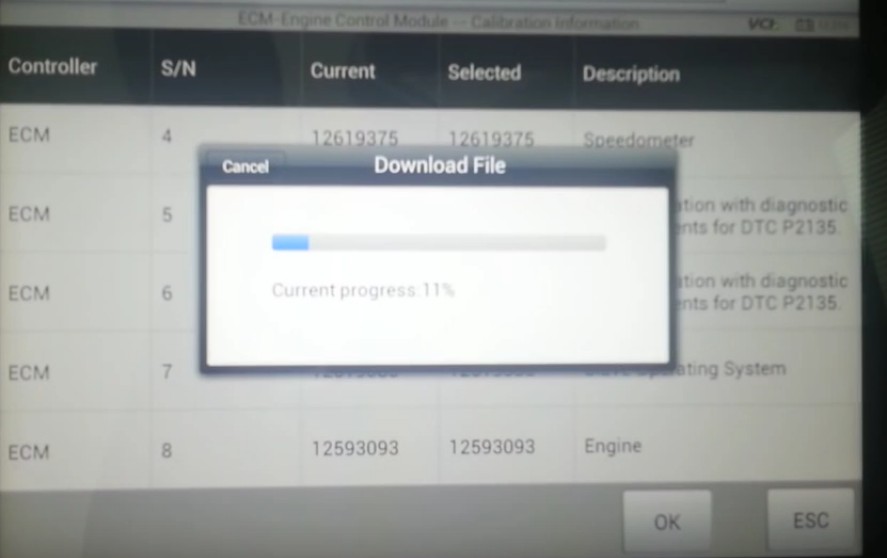
Reprogramming…
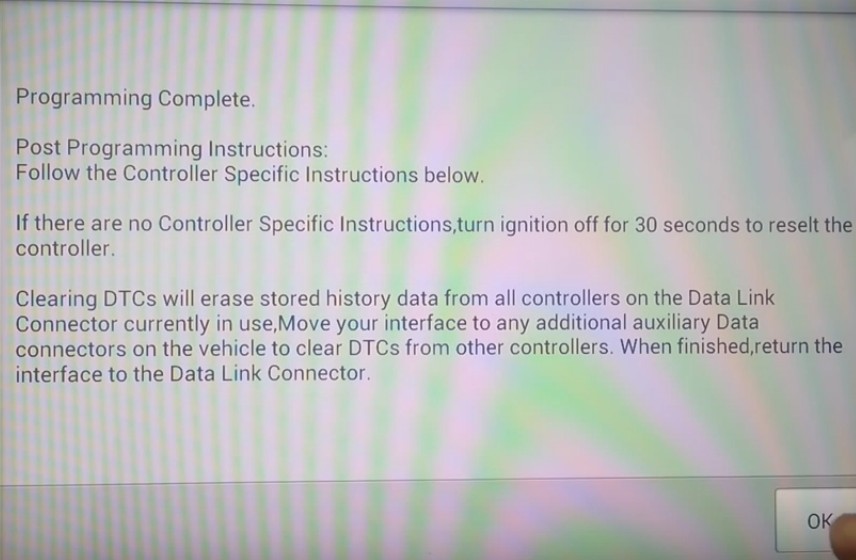
Programming complete, and read the post programming instructions and tap OK to go on.
( post programming instructions:
If there are no Controller Specific Instructions, turn the ignition off for 30 second to reset the controller.
Clearing DTCs will erase stored history data from alll controllers on the Data Link.
Controller currently in use, Move your interface to any additional auxiliary Data connectors on the vehicle to clear DTCs from other controllers. When finished, return the interface to the Data Link Connector.)
Tap “Yes” to clear the DTCs.
Establishing vehicle communication…
Tap OK for erase codes command sent.
Tap “NO” for not to proceed the same VIN.
Tap ESC.
END.
How to choose a good battery charger?
Finally, you need a battery maintainer. This is different from a battery charger. A maintainer sustains output voltage levels regardless of load changes.
Here’s why that’s important:
If you cycle the ignition on and off during the programming process, it’ll change the load on the system. A battery charger can’t adapt to this change, so it could allow the system voltage to vary. If the voltage drops below critical levels (or rises too high), it’ll cause programming errors and could damage the computer being programmed.
With all the hardware in place, you’re ready to begin programming. The process is straightforward: First, determine whether the vehicle needs to be reprogrammed. To determine this, visit the OEM web site and download the software for your application. Your pass-thru device software may have a toolbox that can assist you in navigating the OEM sites to make sure you access the programming you need.
For most manufacturers, you can access this information for free, although you may have to read the fine print to find where they hide their information. The manufacturers only need to comply with the standards; nothing says they have to make it user-friendly! There will often be bulletins available with updated software information.
Once you’ve determined there’s an update available for the vehicle you’re working on, you’ll need to purchase a subscription. This allows you to download the factory program onto your computer or scan tool.
After you have the program downloaded, you’ll need to connect your computer to your pass-thru device and your pass-thru device to the vehicle OBD-II connector. Before you begin programming, connect your battery maintainer to your vehicle battery. Make sure your computer is fully charged (if using a laptop), or plug it in to an AC source.
Place the laptop where it won’t need to be moved or disturbed. Follow the instructions from the OEM download. Make sure you read everything and follow all instructions. Once you’ve completed the programming successfully, there should be a prompt on your computer screen indicating the programming is complete.
If you encounter issues during programming, never turn the ignition off: This could cause computer failure. Contact your pass-thru device manufacturer or refer to the pass-thru device software troubleshooter for assistance. Most programming issues are caused by voltage stability problems during programming.
That’s all there is to it: Now you have the power to control your programming needs. Unfortunately, even though the standard gives you access to what the dealers have, it doesn’t mean you’ll be able to program all PCMs, TCMs, and ECMs. Not all manufacturers are in complete compliance, so in those cases you’ll need their tool to program the vehicle computer.
Hope it helps.